Sunday, November 27, 2011

Laura's 60th Birthday Book

And now it is Laura's turn!!! I've been making special birthday books as each of my friends in this particular group turns 60. In Feb, Laura will be 60. It's only November, but I needed to get some projects finished early because of other commitments I have coming up. The hardest part about doing these books is selecting the pictures and getting an idea of how to organize them. Maybe it was a good thing that so many of us turned 60 within a year of each other because once I got on a roll with these books it seemed to get easier.


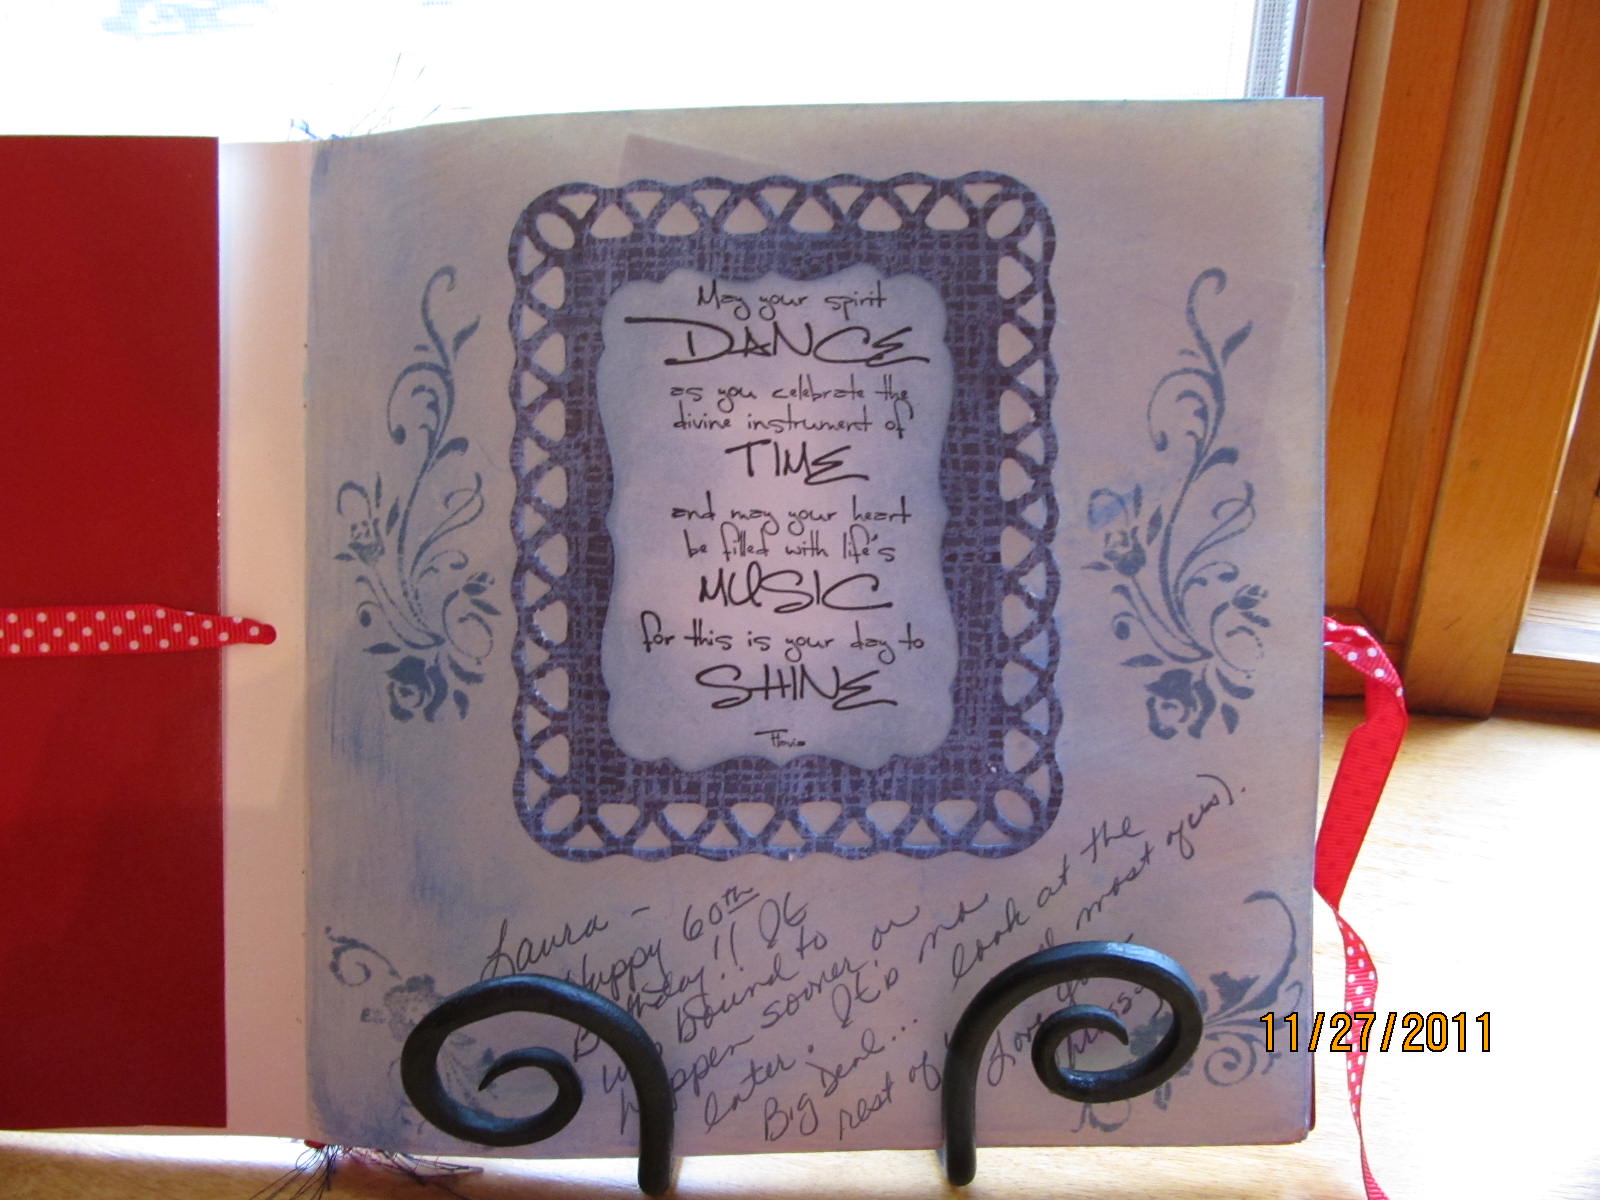
I really like the saying on the stamp I used for this first page. I've used it several times now and think it is very appropriate here also.
I had a great time making this book for Laura.


This book is a great keepsake for Laura. It contains only a few of the pictures that tell our story. I didn't always remember to bring my camera along, but I'm glad someone did. I collected pictures from our group of friends and scanned them.. knowing that someday they would come in handy. They sure have been 'handy' as I've been creating these birthday books as each of our group turns 60.


In our early years we'd travel to the WI State Bowling tournaments. We didn't really care that much about the bowling part... we just had a good time.
And then we were able to organize a weekend to Door County during the Pumpkin Patch festival. We'd like to do that again, but it is really difficult to coordinate.


One thing is for sure... our group knew how to have fun!!!
Many years ago we spent the weekend at a local hotel that had a pool... those are the pictures on the left page.
And then there were special birthday celebrations... like Susie's surprise party and the tailgate birthday party - I think that was for Cara and Kathy.


These 2 pages have pictures from several of the birthday celebrations for Laura. The most recent is on the far left when the Milwaukee groups took a limo up to Green Bay to surprise Laura.. and was she ever surprised!!!


Years ago we had a few Halloween parties and luckily I had a couple of pictures of Laura in her costume.
And there were always special events. The 2 pictures on the right are from my wedding. Laura is wearing one of the table centerpieces on her head!!


Our summer get together has been spent at our house on the lake for quite a while now... I don't know how many years?? We've been very fortunate that the weather has been good most of the time. We have a great time. And for this event we even invite husbands/boyfriends and kids.


As with a few of the other birthday books I've been making... the pictures from our annual "cookie bake" need to be included. Not all of us made it to each year's event, but that's the way it is. Years ago we had actually made Christmas cookies at Cara's house and that is why it is called the "cookie bake", but we haven't made any cookies in years. Usually the day is spent visiting various craft fairs and then either going out to eat or eating delicious food at Cara's house.


The End??? No, it's just the beginning of more fun and adventure for this group of friends. I hope Laura enjoys her book. But, she'll have to wait.. it is not even December as I'm posting these images and her birthday is 2 months away!

Monday, November 14, 2011

Happy Birthday Maggi!

I found this box a few years ago.. I think at Michael's. I thought it would be fun to alter and I had the perfect person in mind... Maggi loves birds!!! Her birthday is later this week and I am seeing her tonight at our monthly shoebox meeting so I think it is safe to post this without her seeing this on my blog before I give it to her.
This is a look at the outside of the box; it looks like a book, but it isn't. I am going to transform it into a great birthday gift for Maggi. Here goes....


This is a look at the inside of the box before I started. Lucky for me I had a good idea of what I planned for the box before I started the project. I had all the 'stuff' I wanted to embellish it with and once I started it took very little time to finish the project. Good thing, too.... I had lots of other projects on my 'to do' list.


I started by attaching paper to the inside of the box. In the cover I attached a piece of decorative scrapbook paper that I've had for a couple of years (well, maybe even longer). It seemed a perfect piece of paper as it is a poem by Burns... and Maggi is into literature.
On the right side I attached 2 pieces of the water color paper that I worked on during our Creative Art Camp. The water color paper was sprayed with glimmer mist and the pieces I chose matched well with the scrapbook paper on the left side.

And here is the finished project! I set the box on an easel and opened the front cover.
The flourish in the upper right corner (behind the bird), the wings on the bird cage, and the word 'fly' are all grungeboard or chipboard pieces that I painted and then glued down. The birdcage is cut out of gold card stock using a Tim Holtz die (one that Maggi gave me!). You can't see it in this shot, but there is a small decorative button that I attached to the top of the birdcage.
I used a glue gun when attaching the nest, the eggs, and the bird. The nest and bird stick out from the inside and the box cannot fully close, but I didn't think Maggi would display it closed... after all, the good stuff is on the inside. Happy Birthday Maggi!!!

Monday, October 31, 2011

Creative Art Camp 2011 - Day 6, Sun Oct 30

The party's over!!! They say all good things must come to an end... BUT WHY!!! Who ever said that and why should that be true???
It's Sunday morning and almost time to go to the airport, but first breakfast cooked by my wonderful hubby... with a little Asti!
It was great fun and I'm sure we'll all need a little rest from our art camp. We talked about doing it again... maybe another location next year and then maybe back to my house after that! I sure hope so .. we had too much fun not to do this again!!

Creative Art Camp - Day 5, Sat Oct 29

Some people just need to take a little nap. Well, it was the last day of creating and we had been working our fingers to the bone. On this day we had to make a choice... and we all chose the same project... domino collage. Maggi found this project on line http://creativepointe.blogspot.com/2011/08/sharing-challenge-entry.html
Since this artist sells her work there weren't instructions on how to do this and what supplies were used, but we looked at the end result and came up with our method, but we do thank her for the inspiration.


It took me a while to determine how to use the self timer on my camera, but ... after running over to the computer and looking up the owner's manual on line I did it. We are all holding our domino collage.. and we are proud of them!!!
I think we're all happy we chose this project to do instead of another one.


This is Margaret's collage. Oops, I just noticed I forgot to turn the photo and have the picture on its side!!! I love the alcohol ink color combos that each of us choose. I don't have close ups of everyone's collage.. just 3 of them.
You wouldn't need to confine yourself to 6 dominoes. You could go with more, or with less.


Here is my domino collage. I did string wire and beads at the bottom and do intend to string them along both sides and then add some charms or bling to the front of the project.
I was thinking that you wouldn't have to attach a cord for hanging; instead, you could leave the cord off and display on a small easel.
When doing mine some of the letters on my words weren't dark enough so I used a black fine point sharpie to darken them. Also, be sure that your stazon ink pad is juicy and not dry.

Here is Carol's finished domino collage... isn't it wonderful??? She used a piece of flashing tape on the lower right, and see the bird on the lower left... that is a white gel/paint pen she used to highlight the wings.
We learned lots of things doing this project and we all loved our finished projects. I for one will do this again. I just hope I remember all that I learned of what to do and what not to do!!

Creative Art Camp 2011 - Day 4, Fri Oct 28

We started our day by working with the glimmer mist pages we had created the previous day. We tore them in half and then punched them and the covers using the bind it all. Some of us stamped or embellished some of the pages and then I bound them with the coils.
Some of us, like me, didn't bind it yet because I am going to use it to create a birthday book for a very special friend of mine.


Everyone is intent on selecting pictures or stamps to use on their fragment charms. We used the Tim Holtz fragments that already have a predrilled hole. They come in lots of shapes and sizes. Mary had decided to apply a little alcohol ink to her fragment before attaching the image; I don't have a picture, but it turned out fantastic. The images are attached to the fragment using glossy accents. Then, we ran flashing tape through the cuttlebug with an embossing folder, colored it with alcohol inks, sanded it, and then attached it to the back also.
There were times of quiet contemplation and times filled with talk and laughter.. a very good combination. This was a fun project and I think we all found it enjoyable and relaxing at times. Maggi had seen this project I believe on a Tim Holtz video and Margaret had received some of these charms on a recent Tim Holtz cruise as part of a charm swap.


Here are Margaret's creations...
She attached lobster claws to all of her fragment charms and then strung them onto a chain necklace. Think of the possibilities?? You only need one chain and you could switch out charms based upon color or theme.
I sure wish I would have taken pictures of everyone's charms that day to see all the varieties.

Creative Art Camp - Day 3, Thurs, Oct 27

These are fabric beads. Carol brought fabric and beads so that we could make these and use them as embellishments on our glimmer mist book or other items. We actually did the glimmer mist technique on water color paper first and then while waiting for that to dry we worked on beads. All you do is spread glue onto strips of fabric and then wind it tightly around a straw. You can use decorative fabric or paint, or stamp on fabric before spreading the glue. Then after the beads have dried for a while you can wrap and tie with fibers and wire. You can attach beads onto the wire or just glue them onto the beads.
Well, I was really asleep at the job today... I didn't take any pictures of us creating.. our projects. This is the day we worked with water color paper, mat board, and glimmer mists. This is a picture of Margaret's journal all bound with the front cover complete. But, I wish I would have had a picture of all the sheets of water color paper that we sprayed with glimmer mists.. they were stunning. Margaret brought the idea and her supplies; I know we completely used some of her colors.


It wasn't enough that we worked all day on projects.. now, I was making them work for their supper. We were having pizza on the grill and each of us needed to roll out pizza dough for their individual pizza. Luckily we were able to clean off part of our craft area so that we could get out the flour and roll the dough!


What's a little flour between friends? Bev got a little crazy and a some of the flour went flying... right onto Margaret!!
It was totally unexpected and I wish I would have had my camera ready when Bev did it because the look on Margaret's face was priceless!!


Bev and Carol are working on their pizza dough. I should have taken pictures of the finished products... after all, they were one of our creations for the day. The pizza was delicious!!!

Creative Art Camp - Day 2, Wed, Oct 26

We arrived at Jan's around 10AM... and what is the first thing we did... well, shop of course silly!! There were items displayed in her living room area and more in her back room studio. And since we were taking a class from Jan we received a discount on all of our purchases that day. We all left with some great buys as well as our wonderful Vintage Valise.


Class has begun... and here is Jan showing us the valise and explaining how it all goes together before we dig into the project. We highly recommend taking a class with Jan Hoefler if you ever have the opportunity; she is a great lady. Check her out at www.redrubberpaperandink.com She also sells lots of the Tim Holtz products and many other 'must have' craft items. She'll only sell what she feels is a good product.


I was at the foot of the table so I had a good view of everyone. I should have been taking pictures of each step as we created the valise and then of each page we created for the inside of the valise, but... there just wasn't time. I was falling behind as it was some of the time. Here's Margaret, Bev, and Mary working hard.


Sometimes during the class you just needed to stop and take it all in ... or think it through before pushing on. Here's Maggi and Carol giving it their full attention. We didn't even finish all the pages that day so Carol took pictures of the 3 remaining pages and one night 4 of us finished them at my house. I still have some tweaking to do to my pages as I write this.


We're hard at work in Jan's dining room. There were so many things to learn and do. This is a class filled to the limit with all sorts of techniques and materials. We were her 'firsts' to take this class. She had tons of patience with us and she learned from it too. It went way beyond what any of us imagined... and we all love what we took away from the class.


And here is the finished product... well, this is just the outside of the vintage valise. It is filled with pages, each showcasing a different technique or product.
We were 'brain dead' by the time we were finished. What we thought would be about 4 1/2 hours ended up being 7 hours. We were going to go to Hobby Lobby for shopping after, but forget that!!! We stopped for something to eat on the way home and crashed.
Jan is a terrific teacher!!! We'd all take another class at any time.

Creative Art Camp 2011 - Day 1, Oct 25

After months of planning... the day finally arrived. Margaret, Bev, and Carol flew into Milwaukee and drove out to my house. It was late afternoon, too late to start a project, so we took advantage of the dry weather and went for a pontoon boat ride. Maggi drove over to welcome the group too. So off we went with cocktails in our hands to enjoy the last of the colorful fall. It was a little chilly, but we didn't want to wait for another day in case rain would sneak it's way into the day.

Wednesday, October 19, 2011

Gift box with matching card

Would you believe this used to be a box of Carnation Instant Breakfast?? A friend of mine shared this idea of reusing the box and covering with paper to create a gift box. The decorative paper I used was bright and cheery and offered me many options for choosing a color card stock that would coordinate with it. I chose blue and purple to add interest to the gift box. I used my spots and dots cuttlebug embossing folder on the strip of blue paper and then used an EK Success punch on the purple paper. I've placed some blue and purple tissue paper in the box for the recipient to use.. that is, if I give this as a gift to someone else.
Then, on to the matching card...
I couldn't believe I had a roll of multi-colored rick rack that matched the decorative card stock perfectly!!!
I used the spots and dots cuttlebug embossing folder on the purple card stock. I liked the look of purple mounted onto the blue card. To match the gift box I cut a piece of the decorative card stock on a diagonal and mounted it onto the purple layer.
The sentiment was stamped and then cut with a spellbinders label die. I used broken china distress ink to add color to the white card and then cut a larger label die from the blue card stock to mount the sentiment.

Gift Card Holders

Take a look at this cute Christmas themed gift card holder. I made this at our recent monthly 'shoebox' meeting... thanks Maggi for sharing.
The base is kraft paper that measures 4 1/4 x 10" and is then scored at 3", 4", 5", and 8". The decorative paper is cut to fit each flap, inside and out. You'll need the following:
Inside pieces: 2 each of 4 x 2 3/4"
2 each of 4 x 3/4"
1 each of 4 x 1 3/4"
Outside pieces: 2 each of 4 x 2 3/4"
1 each of 4 x 1 3/4"
Belly Band: You can use card stock or ribbon cut to about 12" (mine were card stock cut to about 10 or 11". And then you choose or create an embellishment to attach to the belly band.
Here is a look at the inside of the gift card holder and the 'belly band' over on the left side. The inside is decorated with the same paper used on the outside. I did that for all of the gift cards holders shown in this posting.
If you look at the short flap protruding toward the bottom of the inside... that is where the gift card is placed.
These are so easy and fun to make!
Thanks so much Maggi for bringing this project to our 'shoebox' meeting.

Wouldn't this gift card holder be great to give someone a gas gift card??? I used a card stock that has a map printed on it to decorate the kraft base. I used a corner rounder on the front flap for this holder and the rest shown below. The 'belly band' of kraft paper was run through the 'clockworks' cuttlebug embossing folder. Even though 'clockworks' is clock related, I think that it also looks like a bunch of gears.. and who can tell if they are from a clock or a car engine?? The car stamp is from Tim Holtz. I stamped it and cut it out to mount it onto the 'belly band'.

This gift card holder was created using kraft for the base and then pieces of basic grey card stock. I used a crimper to create the pleating on the 'belly band' and then used 3 different spellbinders dies and 3 different types of paper to create the medallion attached to the band. It needed just a little more so I added the faux gem.
This gift card holder will be usable for any occasion.

This Christmas themed gift card holder should spread some joy!! I still have some decorative Christmas card stock and I'm trying to use it before buying any new stuff. I used a boysenberry colored card stock for the base of this card.
For the 'belly band' I used a cuttlebug embossing border of snowflakes on a dark green strip of card. I mounted that onto a slightly wider piece of boysenberry card stock. The cute little bear is taken from a Christmas card a friend of mine created years ago. It isn't a stamp; it is a piece of fabric glued to card stock.

This Christmas themed card holder uses the same decorative card stock as the previous one, but I used a dark green card stock for the base. A few years ago I had ordered some Christmas embellishments from Oriental Trading Company and still have some left... like this metal Christmas tree. It looks perfect attached to the 'belly band' on this card holder.
Christmas is just around the corner you know!!! I really need to work on my Christmas cards!!


Here is another Christmas themed gift card holder. I used the paper that was left over from the large sheet Maggi gave to each of us at our monthly 'shoebox' night. Instead of using kraft paper as the base I had a green card stock that matched the stripes perfectly. I also had some felt mittens I had purchased several years ago, so I attached one of them to the 'belly band' on this card holder.
I had used a clear stardust gel pen to add sparkle to the snowflakes across the 'belly band', but it is not showing up in this picture.
I think I may be making more of these soon!

Friday, October 14, 2011

Mini Pizza boxes.. with chocolates

Back in Sept, a friend of mine (Bonnie) showed me and a few others how to make a mini pizza box. You can see that box on her blog, along with a video from Split Coast Stampers where Bonnie first saw this project.
http://craftiblog.wordpress.com/2011/09/19/2011-09-17-mini-pizza-nugget-box/
Bonnie altered the original size of the box so that it would accommodate the candies we were using to fill the box. So the size of paper used to create the box is 5 1/2 x 8".
I love this paper! I can't remember where I purchased it, but I did buy about 4 - 12x12" sheets of it. It is so bright and cheery.
For the 'belly band' on the left I used a strip of the same paper used for the box and attached that to a wider strip of red paper. I stamped a flower stamp (a $1 stamp) onto pink and red paper twice then cut them out. The image was such that I could cut out an inner flower and outer flower, so I did one of each and then mounted them so I had both pink and red on each flower.
On the right 'belly band' I attached a quilled flower. No, I didn't make it. A friend of mine had bought a bunch of them and gave me some to use.


I found this cute multi-colored polka dot paper at my LSS (Polka Dots). The brown background reminded me of chocolate which was going to be the prize inside these candy boxes... so, perfect! The 'belly bands' for each is slightly different; one used the same paper as used for the box while on the other I used a blue that matched the dotted paper.


I used a small pinking circle spellbinders die and a slightly larger inverted scallop circle spellbinders die to stamp the sentiments on.
I had these sentiment stamps as part of a set that I had purchased from Stampin Up a long time ago. I sort of forgot I had them, but glad I remembered as they came in handy for these candy boxes.


The paper for both these boxes was from a 12x12" specialty pack made by Cloud 9 Design. For the 'belly bands' I cut a narrow strip of the same paper used for making the box and then glued that to a slightly larger strip of coordinating solid paper. I used a couple of spellbinders label dies to mount the sentiment on.


I love my new little bird stamp. I picked it up at Hobby Lobby... on sale, of course. I didn't have a whimsical type bird. I stamped the birds on blue paper, cut them out, and then stamped just the wing on patterned paper, cut it out and glued it to the bird.


It was fun and a challenge to find stamps and embellishments that I already had on hand to adorn these candy boxes.
My spellbinders dies were a big help.
I had seen a stamp with the sentiment 'sweet tweets' at the LSS, but I didn't want to pay $7 for it so I tried my own hand at writing it on some of the labels. I did okay, not great.
The paper for both of these boxes was from a 12x12" specialty pack made by Cloud 9 Design.
On the left I created the 'belly belt' with a piece of white card stock that was embossed with a cuttlebug folder called 'musical flourish'.

Oh yum!!! I'd better start giving these boxes away or I may find myself raiding them for the chocolate in a weak moment!
These small hershey treasures are the perfect fit for the boxes. That is what my friend Bonnie had in mind when she reconfigured the size of the box and changed it from its original size.


On the left I used paper from a K&Co designer paper pack called 'Sea Glass'. I think my dollar stamp sentiment says it all.... 'simply enjoy it all'! On the right I used paper from my Basic Grey paper pack. It is time I start using up paper instead of hoarding it.
For both boxes I used a spellbinders fancy tag when mounting the sentiment on the box.
I'm now in search of stamps and sentiments that will be perfect adornments on these candy boxes.


Chocolate, chocolate, and more chocolate!!! You could fill these boxes with other things, but who doesn't like a little chocolate? Well, I do have one friend who is allergic so I guess I won't be giving one of these to him.
I'm guessing I'll be making more of these little boxes as time goes on.