We had a great play day at Maggi's. Maggi, Pea, Mary, and I got together with the intention of trying various background techniques. Each of us came with several ideas. Other than a break for lunch, delicious corn and wild rice chowder and sandwiches, and another break for dessert, yummy pie, we worked from 9 AM until about 3:30. We had a great time, completed lots of backgrounds, and came up with some ideas for our WI Art Retreat to be held sometime in October this year.
Even Miss Rosie got involved!!! First she jumped into Pea's craft bag....
And then she jumped into Mary's bag...
She attempted to take a nap in the bag, but there was too much activity going on so eventually she wandered over to her little bed.
Pea came prepared for all her techniques including this one. She had stamped an image with embossing ink and then heat embossed with clear embossing powder on a piece of glossy card. Each of us then colored our papers wtih various colors of alcohol ink. This one happens to be mine. But here are pictures of the others....
Notice how you can still see the embossing. It does not get covered by the inks.
Once we were finished with this step, we moved on to the next step. This technique produces 2 background pieces not just one.
We placed a piece of non glossy card stock on top of the piece we just inked and then ironed them. Yes, iron. I brought along a travel iron that I use for crafting and it worked great. The heat of the iron melts the embossing powder transferring a colored image onto the non coated card stock. Here are the results...
This is the sample that Pea made at home before our play day.
Here is another background technique from Pea. She brought 2 pre-stamped pieces of glossy card stock for each of us. She stamped them with brilliance ink. Then each of us applied distress inks to the card stock. We used the ink blending tool, but rather then pressing the ink blending tool onto the ink pad and then applying the ink to the card... we applied ink from the ink pads onto our craft sheets, spritzed them with water, and then used the ink blending tool to apply the ink. This was a much smoother method of applying the ink. This is a picture of all of our pieces.
And a 3rd technique from Pea...
On a regular piece of card stock Pea had stamped a background image (all the swirls) by applying white acrylic paint to her stamp using a sponge brush. Pea brought one of these for each of us. Next we all stamped the 'postal' type image using slate, black, or brown ink. After the ink dried we rubbed the card with a paper towel removing some of the ink from the painted areas. For the last step we applied distress ink with the ink applicator tool. As in the previous technique we first applied ink directly from the ink pad to our craft sheet, spritzed with water, and then used the foam ink applicator. Here are the rest of our pieces...
Now on to one of Maggi's techniques...
We all rummaged through a large pile of mulberry and handmade paper. Maggi gave each of us a small plate for pva and a sponge brush along with a water brush. We would tear our papers by first applying water with the water brush to aid the tearing process. Then we would attach our strips and pieces of handmade papers to a piece of card stock or watercolor paper using the pva. Here are the results of our efforts...
This is Maggi's ... I love all the colors she used!
This is Mary's... Very artistic!!
And here is Pea... She is trying to hide behind hers.
And then there is mine. I did two half sheets instead of one whole sheet.
Here is another of Maggi's techniques...
She gave us each a roll of waterproof tape. We are creating our own tissue tape. We laid several strips of the tape onto our craft sheet. There were several ways to approach this.
- You could stamp images onto the tape and be done
- You could stamp images onto the tape and then apply more color with other inks on top of the images
Or
- You could color the tape with various types of inks and then stamp images
Each of us did our own thing. But we did discover some things. Distress inks take a long time to dry. I even heat set mine and they were still a bit wet to the touch.
If you wanted to use a dark ink for stamping the images it was best to use a stazon or india black ink, but even those did not dry quickly.
Most of us left our tape on our craft sheet to dry. I even brought mine home on the sheet and will let it dry overnight.
These are my faux tissue tapes.
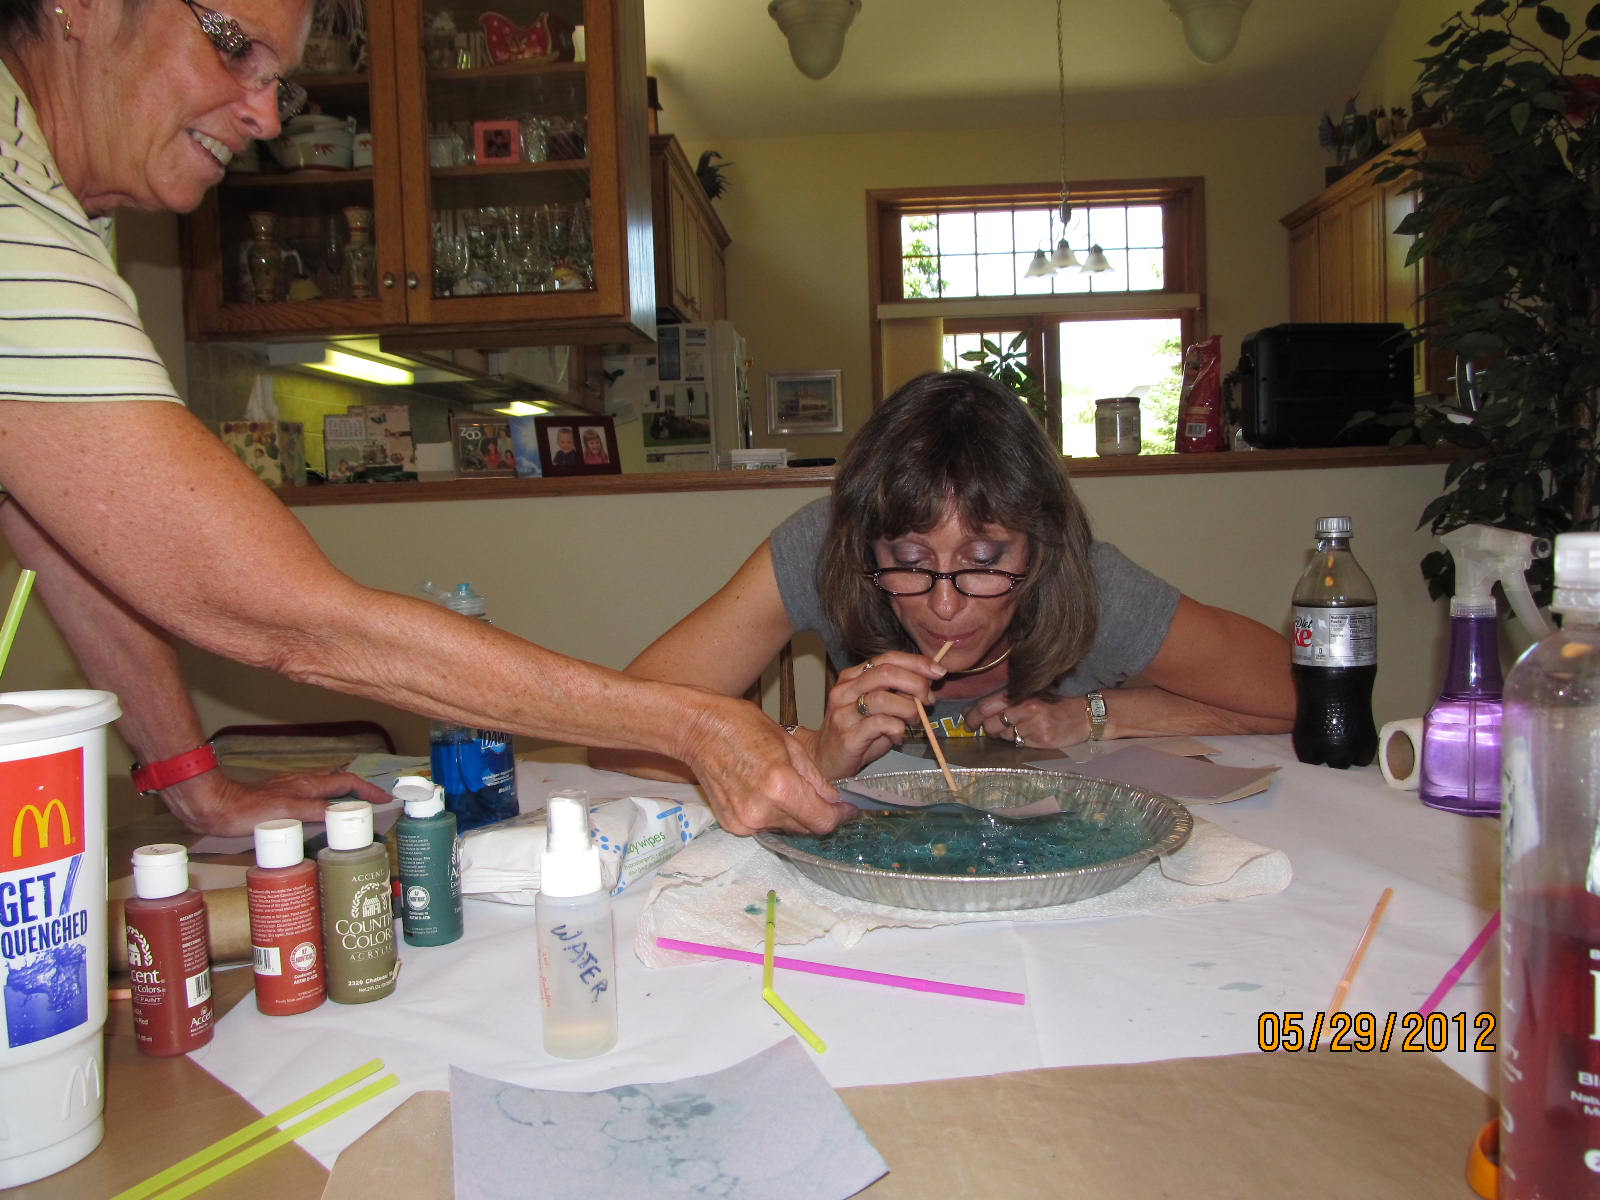
Now let's look at Mary's technique's. What is Pea doing? No, she isn't having a taste of some delicious concoction! We were getting a lot of laughs doing this technique.. as you can imagine.
The technique calls for putting a little water, a little dish soap, and water soluble paint into a small bowl. The aluminum pan we first started with was too large, but we struggled through with our first batch of green bubbles.
After stirring the mixture and adding more paint, more water, and more dish soap one person would blow through a straw into the mixture. As bubbles formed another person would lay a piece of card stock onto the bubbles. We found that the best way to get the color/bubbles to transfer to the card stock was to hold the card stock over the pan as the other person was blowing the bubbles.
After blowing bubbles in green paint we took a smaller dish and did the same with red paint. We created some pieces with just the green, some with just the red, and others with a combination of the two.
We used some regular white card stock, some glossy card stock, and some colored card stock.
Everyone was happy with their results.
But if you try this ... make sure you only blow through that straw!! You sure wouldn't want to suck any of that stuff in... YUCK!!!
Another of Mary's technique was shaving cream and reinkers.
Mary brought a large aluminum pan that she sprayed the shave cream into. Then several of us took turns selecting 3 colors of reinkers to drop into the shave cream.
Mary used a plastic knife to move the ink through the shave cream.
Then each of us would lay a sheet of our card stock into the cream and press lightly so that the sheet would be covered with the shave cream. After removing the card stock from the cream we would use a plastic knife to scrape the cream off our card and then we would use a paper towel to take off the remaining shave cream.
It was amazing how different the card looked after totally removing the shave cream.
We each used several types of paper: kraft card stock, glossy card stock, white uncoated card stock, and curious text weight card (this has a sort of metallic sheen to it).
And we made several batches of shave cream using a different set of reinkers with each batch. These will make great backgrounds.
Here are some techniques I brought....
In this grouping of pieces are 2 techniques. For both we used a combination of distress inks and brilliance inks.
We used uncoated white card stock and glossy card stock.
On some of the pieces we used crumbled pieces of wax paper tapped onto the ink pads and then pounced on the card. You could use as many or as little color combinations that you wished. And you could use only distress or also add brilliance to the mix.
On others of the pieces we used scrunched pieces of plastic wrap tapped onto the ink pads and then pounced on the card.
This technique is called Faux Marble.
There was a different look to the ink applied with the wax paper than that applied with plastic wrap. I think the difference was that the ink applied with wax paper was more distinct, and that applied with plastic wrap had a softer look.
And then there was the Fossil Stone Technique using acetate.
I brought a sheet of heavy duty acetate for everyone to use.
The instructions were to sponge the reinkers onto the acetate using a synthetic sponge, and to not overlap the colors.
Next lay a piece of glossy card stock onto the acetate and brayer.
Then peel off the card stock.
We experimented...
We tried dropping the reinkers onto the acetate and then moving them around with the sponge, but sometimes that seemed to leave you with a large dark splotch of color.
We tried to drop the reinker onto the sponge and them dab onto the acetate.
I found that whichever way I applied the reinkers to the acetate that if I spritzed the acetate with water before laying down my glossy card I got better results.
I used the brayer, but found that using my fingers worked well.
We made sure we didn't use any permanent ink reinkers so that we could clean off the acetate and apply a different set of colors for another batch of card stock.
Look at the gorgeous colors in Maggi's batch!
It was such a fun day...
Thanks for hosting our play day Maggi... and thanks for the delicious lunch!!
Thanks for taking a day off work to join us Pea!!!