
On a Friday afternoon in early July, my friend, Mary, and I took a trip to Appleton, WI. We had signed up for 2 card classes that coincided with a warehouse sale at The Paper Cut. Our first class was 'shaker cards'. The classes were given by Sarah and what a fantastic job she did. All the elements and pieces needed for each card were provided in individual envelopes with other supplies, such as stamps, ink, ribbon, etc located on the tables. She instructed us in the basics of how to use the 'shake it' pouches, an Impression Obsession product, and away we went. Mary and I ran out of time and didn't finish the 9th card for this class. It was like a stamping marathon, but we are so happy with the results. Of course we had to buy some of the shake it pouches and window cards at the warehouse sale that started after our second stamp class. The Paper Cut is known for their precut cards and card panels that work perfectly with these shake it pouches.

And here are the other 4 cards we finished in class. These are so cool!!!! And they are so much easier to create using the 'shake-it' inserts.
One of the other tools we used for many of these cards was also an Impression Obsession product ... cover-a-card stamps and the mega mount. These are large background type cling stamps that attach to an acrylic curved mount with a handle. After inking the stamp, you apply the ink to the card by 'rocking' the mega mount across the card front. All 4 of these cards have backgrounds created using these tools. Here's a link to view the stamps and the mount.
http://impression-obsession.com/Merchant2/merchant.mvc?

The second class that Mary and I took that day was "Making cards using acetate". We were given 10 cards to create with all the pieces for each of the cards provided in individual envelopes. Before we started Sarah explained, and handed out typed instructions, on how to print pictures onto acetate using your computer and printer. For this class she had provided the pieces of printed acetate so that we could concentrate on creating the cards. We had just enough time in the class to finish the cards we were given.
Here are 5 of the 10 cards. The pictures on the acetate may look a bit fuzzy and that is because when I laid the cards on the table the front panel of the card didn't remain flat against the back of the card resulting in a slight distortion of the image that is printed onto the acetate.

Here are 4 more of the acetate cards. There was a 10th card, but I had already mailed it to our neighbors in celebration of the birth of their baby girl.
Mary and I had a great time, but were exhausted from the 2 classes we took. After this second class it was time for the warehouse sale... and what a sale it was!!! The deals were fabulous! We hope to go again next year.
Check out The Paper Cut, and if you live near Appleton, WI you just have to attend next year's classes and warehouse sale.
http://www.thepapercut.com/
 It is only August, but some things have to be completed ... like these calendar easel cards... and Christmas cards (oh boy, I need to start on those!).
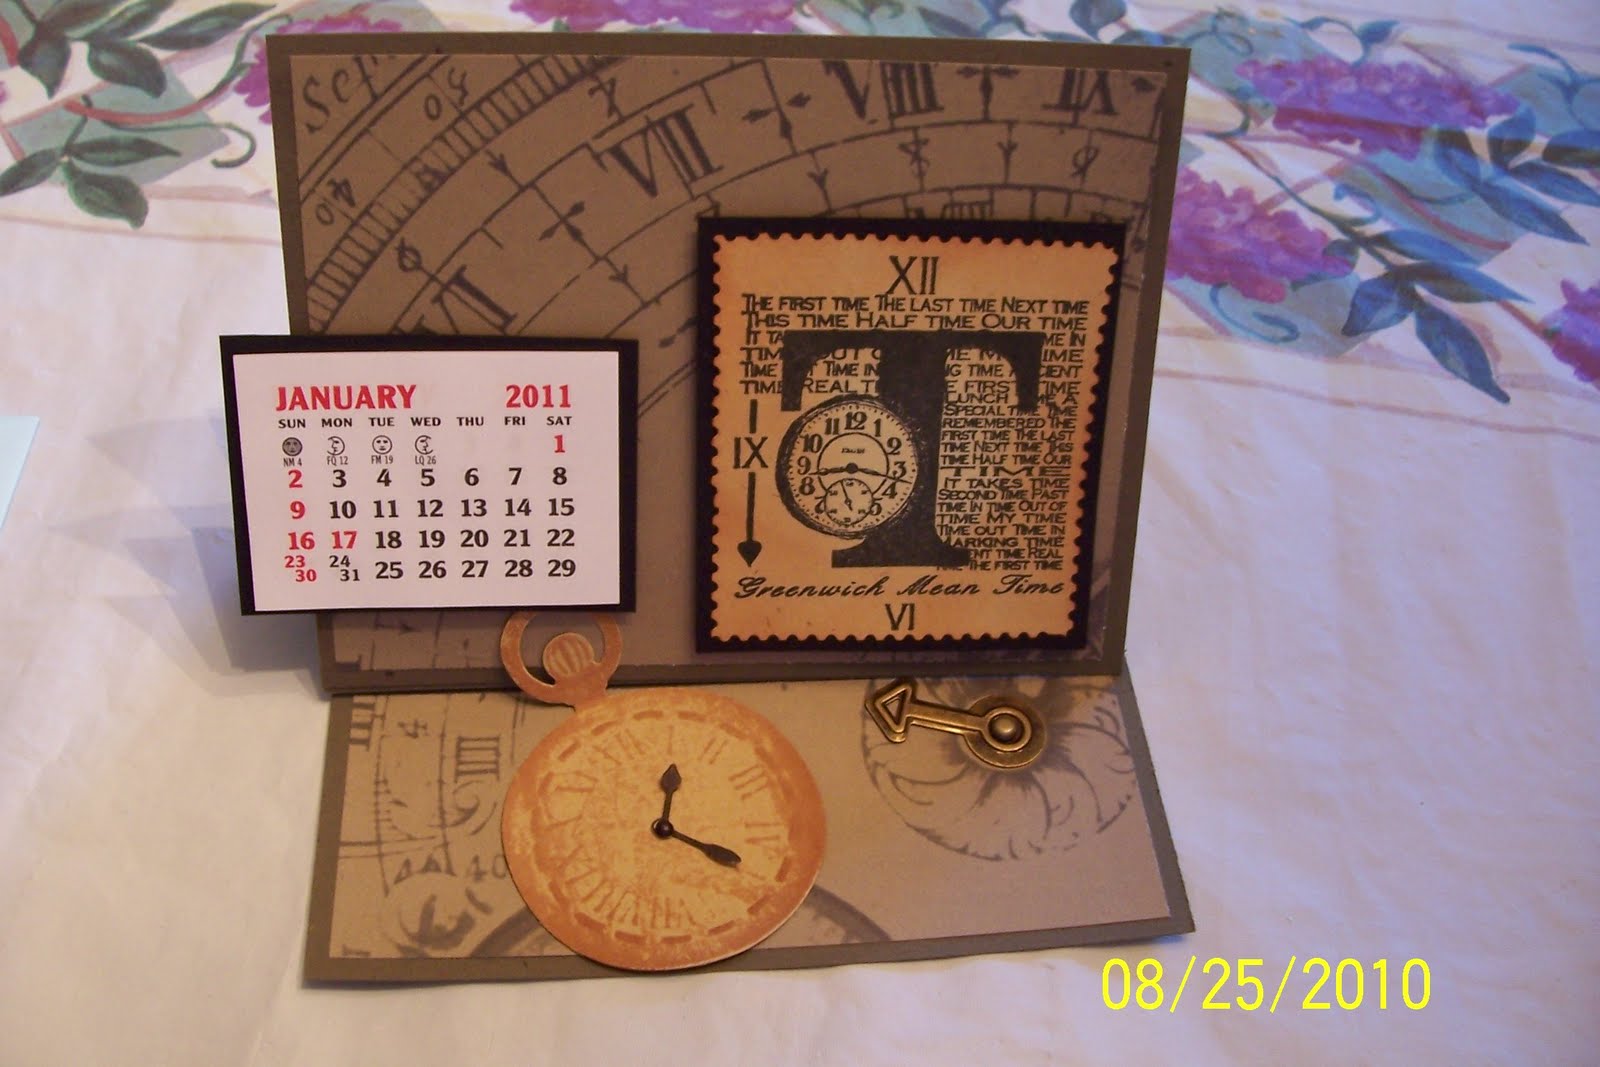 Here is what this easel calendar looks like when opened. I made 4 calendars with this design and the front panels are the same, but the base for each of the 4 are different. This base contains a piece I cut using a nestabilities die.
 My Stampers Anonymous 'T' stamp seemed so appropriate for calendars so I used it again with a different design. I also have the cuttlebug embossing folder 'numbers' so I used that together with the stamp to create these easel card calendars.
 Here's one of the previously shown easel calendars opened and standing up. Each of the calendars contains a different quote. I typed the quotes and printed them from the computer. The quote was layered onto the piece of scrapbook paper that I attached to the base of the card. I attached a piece of ribbon across the base so that the front of the easel card could be propped up against it.


