This is the cloisonne technique from Suze Weinberg. Using a tweezers dip a Formica sample chip into melted black UTEE to cover one side of the chip. Remove and let cool. Using a brush, apply various colors of perfect pearls to the chip. Now heat the chip using a heat tool to soften the UTEE and immediately press a stamp that has been inked with gold brilliance pigment ink into the chip. Let cool and remove the stamp. You can take this a step further, I didn't, by again heating the chip with a heat tool and the colors with meld together.
I liked this technique best and I think it worked for most of us. Lay a memory frame on top of a stamp; I used a background image of swirls. Slowly pour the melted black UTEE into the memory frame being careful to not overflow the boundaries of the frame. Let cool and lift the memory frame off. Then brush on perfect pearls and you can also add some glitter glue as I did in my piece.
This did not turn out as the utube video showed. Lay the memory frame on a craft sheet and pour melted UTEE into the frame. The utube had melted clear and a small bit of white UTEE added. We used clear with a bit of pearl UTEE. Again be sure to not overflow the boundaries of the frame. While the UTEE is soft press a stamp that has been inked with embossing or versa mark into the UTEE. Let cool before removing the stamp. Now sprinkle embossing powders onto the image and heat with a heat gun. I think I heated too much and lost the definition/image created by the stamp. Oh well, this one will require practice.... if I decide to do it again.
Next we moved on to the ATC booklet. This is the sample I made prior to the Art Camp. I altered the instructions of the booklet that Maggi had found on line so that it would accommodate ATC's. I cut pieces of mat board for everyone and had found small envelopes that were approximately ATC size so that all they would need to do was assemble. This easy booklet takes less than a 12 x 12" piece of decorative cardstock to make... if you don't make the insert envelopes by hand.
When I created my sample I did make the inserts and created a template so that I can do this again.
Thanks for finding this project Maggi... I think everyone liked it.
 We needed to take a break for lunch at this point. Some chowder that Maggi made for us and sandwiches. We really got a lot done... and besides... it was Margaret's birthday today!!!! We had lunch and then had Birthday Apple Pied baked in a paper bag from the Elegant Farmer. Thanks Mary ... for getting the pie.
 And now... the shadow box. Maggi had received a shadow box from her sister. Inside the box were various pieces of paper rolled and secured with thread and embellishments. It looked like something we could do...why not??
I had picked up some 8 x10" black framed shadow boxes at Michael's. We told everyone to bring decorative or handmade papers and embellishments and ribbons or threads for this project.
Mary brought over lots of interesting papers and others brought papers that were added to the center of the table for everyone's use.
Maggi started us out by showing us how to roll the papers using a bamboo skewer and glue.
It got pretty quiet for a while as we all concentrated on our shadow boxes.
I haven't finished mine yet...I have all my papers rolled, but haven't added the fibers and embellishments. At least I remembered to take pictures.
I think they all turned out great!!! Here are pictures of some of them. Above, Bev shows off her art. I'm not sure whose art is on the right!!!
I got a picture of this one before we put the frame on. Maggi had a great idea... since she already had the one her sister gave her she didn't need another. So we all contributed rolled papers for this one on the left that Maggi worked on. Margaret and Maggi worked on the finishing touches and we took it along on Wednesday and gave it to Jan since she couldn't be with us on Tuesday.
Here is a picture of Jan's shadow box after it was completed. We gave it to her the next day and she absolutely loved it! This box is facing the wrong way in the picture... it is intended to be hung up in a landscape orientation.
Here is a picture of Margaret's completed shadow box. Again, it will be hung in a landscape orientation.
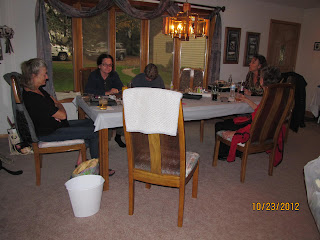
We're done!!! Maggi has left for the day and the rest of us are having a drink!... Yes, in some cases an alcoholic drink... We deserve it!
I can't believe all that we accomplished!!!


No comments:
Post a Comment