Saturday, January 29, 2011

"Old Guys Rule"

One day last week Maggi and I went to check out a new scrapbook store in Milwaukee. We found some 12 x 12" scrapbook paper with the "Old Guys Rule" theme. The two beer label type images you see in this card and the one shown below appear repeatedly across the paper.
I thought it would be great paper to create some comical masculine cards. I made 11 cards from the one sheet of paper that I bought.
I have a couple of 'old guy' themed stamps that I did use on a few of the cards. Won't this card, and the one shown below, be great for a golfer!


This card if very much like the one shown above. The only difference is that the image is mounted on an additional layer, and the color scheme is different.


On this card I simply added a ribbon and a punched border on the 'outdoorsy olive' colored layer.


On the two cards shown at the right I used one of my punches. For the first card shown I punched all the way across the top and bottom of the dark navy layer so that the decorative edge was completely separated from the larger piece of paper.
On the second card I used the same punch, but did not punch all the way across the bottom of the 'outdoorsy olive' colored layer.


I was having fun with the various color combinations that worked well with this scrapbook paper. And I had various cuttlebug embossing folders that lent themselves well to the theme of the cards also.
For these 2 cards I cut out 1 of each of the 2 images that appeared repeatedly across the 12 x 12" scrapbook paper.
I also had some very thin brown ribbon that looked great as an embellishment on several of the cards I made.


Although different color combinations, both of these cards incorporate the same basic design. Another difference is the cuttlebug embossing folder used for each. One of them is using the 'happy birthday' folder and the other uses the 'numbers' folder.


On these 2 cards I used my nestabilities dies to create a raised frame on the cards.
I used another one of my comical 'old guy' stamps for the card on the top.
For the card on the bottom I used a cuttlebug embossing folder - 'happy birthday'.

Wednesday, January 19, 2011

Playing with a new stamp

There was a rummage sale at the local stamp store this weekend. I took lots of things that I don't use and don't want anymore. But of course, I came home with a few things that other stampers didn't want anymore!!!
I thought this stamp was so funny .. and it was only $2.00!!
I wanted to see how the image looked so I stamped it 4 times on plain white card stock using 4 different colors and types of ink. As long as I did that, I thought why not make up some cards?? I got out some Tim Holtz paper, distress inks, my sponge applicator, and various embellishments. Here are the results!!
I really like how using the distress inks and sponge applicator work to soften, and in this case age, the image so that it looks good on the background papers I chose.

Here are 2 more cards using my new/used stamp...
I'm really proud of myself for a couple of reasons..
- I used the stamp I bought right away instead of putting it away with my other lonely stamps that haven't been used yet
- I used some of the Tim Holtz paper I bought months ago that has been sitting in the closet
- I used some embellishments that have also been left neglected in my enormous stamping supply stash

Now I need to get in my stash and use some of the other things that have been there for years!!!

Faux bleach technique

I was searching for ideas one day and ran across the faux bleach technique on Carol Sweeney's blog. I love it!! There are a couple of faux bleach techniques. For this one, you stamp with versa mark or embossing ink onto white glossy paper, dry with a heat gun, apply dye inks to color the background, buff with a paper towel, and then stamp over with a different image/stamp using a darker colored ink.
On the left I stamped a word stamp using the versamark and then sponged on various adirondack dye inks. I then stamped another word stamp using black ink over the background. On the right I stamped a music type stamp in versamark ink, sponged on various colors of distress inks, and then stamped a word stamp over the background.
For the card on the left I used one of my fairy stamps from Sweetpea Stamps. After stamping it, I used some of my adirondack dye inks. The image is somewhat detailed and I didn't know if I'd like how it worked using this technique. I do like it; I just don't like the rest of the card!!
For the card on the right I used a latticed background type stamp and then applied distress inks. It resulted in a very pastel looking background. I do like how this card turned out.

Thanks Carol for your continued inspiration!!!

"F" is for "_____" Swap

I recently ran a swap titled "F" is for "____". In this swap the participants are to create something that is somehow associated with the letter F. I just closed the swap and am getting ready to package my swap items up to give to Maggi.
To start with I have a faux leather purse that is just the right size to hold several greeting cards. The funny thing is, Maggi is the one who found the website that demonstrated how to create this faux leather purse!!
The cards I am including in the purse are all somehow related to the letter F. Here they are....

The oriental theme is one of Maggi's favorite. She may even recognize the ginkgo patterned paper I used on this card since she was with me when I bought it at a Paper Adventures warehouse sale several years ago. The silver fan charm is the key to this card fitting into the 'F' theme of this swap.


Faux foil... I learned this technique on the stamp tv site where Gina K demonstrates many wonderful techniques. I ran heavy duty aluminum foil through the cuttlebug and then after attaching the foil to a piece of black card stock I used metallic rub-ons to create the look of tin. I think my numbers embossing folder works great for birthday cards.


'F' is for fish on this card. I created a raised frame for the fish using a nestabilities oval die and some decorative card stock. I also used a decorative punch along the right side... bubbles seemed an appropriate punch to use with the fish theme.


Following along with the 'f' theme.. this card was made with a fall motiff. The leaves are stamped with black india ink over a background I created on white glossy paper using alcohol inks. I know Maggi loves the fall colors so I'm sure she'll enjoy this card.


The background under the stamped image is called 'faux bleach'. I found this technique demonstrated on Carol Sweeney's blog; she has wonderful postings and fabulous artwork!!
I stamped a word stamp onto glossy white card stock using versamark. After drying with a heat gun I sponged on various colors of dye ink. Then I stamped over the background using black india ink with the dandelion stamp shown.
I hope Maggi likes her F swap package!!

Monday, January 3, 2011

A book for Alivia

This booklet is for my great niece, Alivia. When I was visiting with them on Christmas day her Mom, my niece Tracie, told me how Alivia loved to look at a small picture booklet I had made for Alivia's older sister, Alexa. Alexa is now 5, and back when she was about 1 1/2 years old I made a cute little booklet. I had forgotten about it otherwise I would have made one for Alivia when she was the same age. Well, better late than never... so here it is!!! I can't wait to see her face when I give it to her.
Tracie was able to provide most of the pictures I used for Alivia's booklet. I'm glad about that. It would have taken me longer to put this together, and I'm not sure how extensive my collection of pictures of Alivia was. Now that the booklet is finished I can give it to Alivia this weekend as they are having a birthday party for her (she was 4 in December).


Don't you love the pics of the 2 little ones all snuggly and happy??? How long will that last? I hope forever, especially for their Mom's sake!


The embellishments I had on hand worked perfectly on some of these pages. The picture of the 2 girls with their Grammy, my sister, happened to be of them on the train at the zoo! And I had the train sticker in my stash!


How would you like to be the Mom for these 3 girls???? They are 4, 5, and 15!!!! Yikes!!! I don't know how my niece, Tracie does it!


Can you tell yet that there is a 'pink' theme going on here??


I love the picture of the 3 kids. They are so close in age and have a good time when they are together... which only happens about 3 times a year.


Since this book only takes us up to about age 3 for Alivia, I'll have to plan on a part 2, and part 3, and so on as she grows older.


The End.
Now Alivia has her own book and hopefully she enjoys looking at it as much as she enjoyed looking at her sister's book.

Christmas gifts - glass blocks

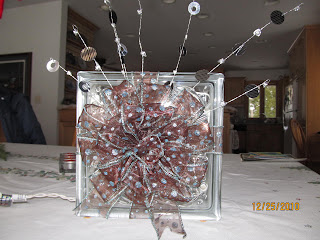
For Christmas this year Bob and I decided to make some gifts for our daughters. We got this idea last year while visiting a friend's house at Christmas time. You start with a glass block; we bought 4 of them, intending to keep one for ourselves. Each of the blocks had a different pattern embedded in the glass. Bob drilled a hole through the glass block and then fished clear christmas lights through the hole and into the block. If I remember correctly there are about 70 lights in each of the blocks. We had purchased lights that contained 35 lights on a string, but found that one string in each block wasn't bright enough. Bob was able to splice 2 strings together for each of the blocks. The pictures below show 2 of the 4 blocks with the lights plugged in.


Here are 3 of the 4 finished projects. I forgot to take a picture of the first one that we completed. We took it with us on a trip to Florida in November so that we could give it to our oldest daughter who lives in south Florida. I certainly wasn't going to package it up and ship it to her. I don't know if it would have arrived in one piece and have no idea how much it would have cost to ship.
I wrapped ribbon around the block and then created bows to make the glass blocks look like Christmas gifts. Then I added some decorative curly sticks and fancy wires behind the bow. They look great when plugged in and lit. We gave these 3 to our other 2 daughters and to the oldest granddaughter.
We decided to give all of them away. If we want one for ourselves, we'll just make another one!